 how-to
Professional Vehicle Wrap Installation Near Me: 2026 Guide
Table of Contents
- What Professional Vehicle Wrap Installation Near Me Actually Involves
- The Vehicle Wrap Installation Process: From Quote to Cured Wrap
- How to Evaluate a Wrap Installer Before You Book
- Vehicle Wrap Cost: What Drives Your Quote
- Fleet Vehicle Wraps for Business: Coverage, Graphics, and Fleet Branding
- Vehicle Wrap Maintenance and Aftercare
- DIY vs Professional Installation: What You Risk
- Frequently Asked Questions
Last Updated: October 16, 2026
What Professional Vehicle Wrap Installation Near Me Actually Involves
Professional vehicle wrap installation near me is the process of applying a vinyl film over a vehicle's painted surfaces to change its color or add branded graphics, handled by a trained installer rather than a DIY kit. At Pearl Wrapz, we treat it as a three-part job: surface preparation, precision application, and a curing period before the wrap is truly finished.
Most guides show a finished truck and skip the twelve hours of prep behind it. The work underneath decides whether a wrap lasts three years or eight.
That matters because a wrap is a marketing asset with a lifespan. A fleet truck that peels in year two costs you twice: once for the original job, and again for removal and redo. The U.S. Small Business Administration guidance on vehicle and equipment costs is a useful starting point for anyone weighing a wrap against other advertising spend.
Below, we break down the full process, what drives your quote, how to screen an installer, and how to care for the finished wrap.
The Vehicle Wrap Installation Process: From Quote to Cured Wrap
A professional vinyl wrap installation moves through five stages: consultation and measurement, surface preparation, film application, post-installation inspection, and a curing period of roughly one to two weeks. Skipping any stage shortens the wrap's life.
Stage 1: Consultation and Measurement
The installer walks the vehicle, notes existing damage, and measures each panel to be covered, which drives how much film is ordered. You also confirm coverage level, finish, and whether the design is printed or a solid color-change film. A shop that quotes without seeing the vehicle or detailed photos is guessing.
Stage 2: Surface Preparation and Vehicle Coverage
Preparation is where installers separate themselves. The vehicle is washed, then wiped with a solvent that strips wax, tar, and road film. Dents, rust, or peeling clear coat get addressed first, because vinyl conforms to whatever is underneath it.
Coverage is the next decision. A full wrap covers the entire painted body. A partial wrap covers the doors, hood, and rear panels while leaving the roof and pillars in the original paint. Partial wraps cost less and suit vehicles where the factory color works with your brand palette.
Stage 3: Film Application, Panel by Panel
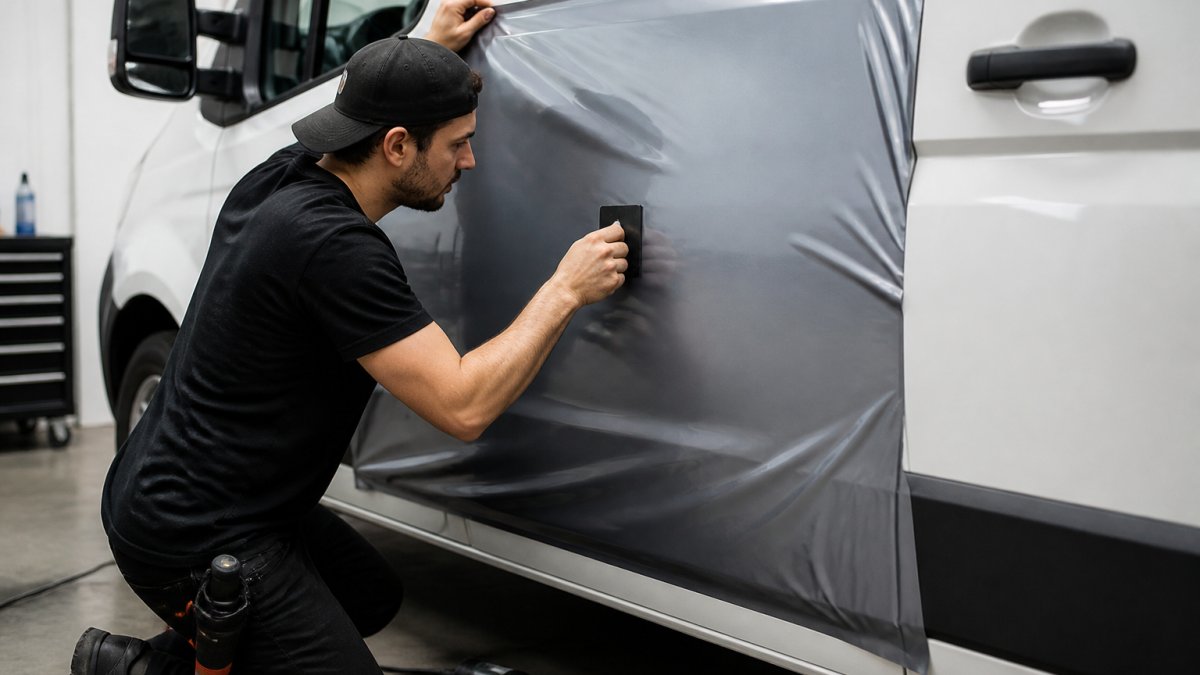
Application happens panel by panel: position the film, anchor one edge, then work out air and moisture with a squeegee while heating the vinyl so it stretches around curves, mirrors, and door handles.
Door edges get wrapped or trimmed depending on coverage level. Recessed handles, mirrors, and antenna bases are usually removed and reinstalled rather than cut around, because a cut edge near a handle is where lifting starts. Experience shows here: a first-timer can spend a day on one bumper a trained installer finishes in an hour.
Stage 4: Post-Installation Inspection
Then comes inspection. A good shop walks the vehicle with you under bright light and flags any lifted edge, trapped air, or misaligned seam before delivery. Ask for that walkthrough, it is your last easy chance to catch problems. Look at door jambs, wheel arches, and the edges of any printed graphic.
Stage 5: Curing
The wrap is not finished when you drive away. The adhesive continues to bond over roughly one to two weeks, and the film can still shift. Most installers ask you to avoid pressure washing and sap-dropping trees. Skipping a post-cure check is a common reason a wrap fails early.
How to Evaluate a Wrap Installer Before You Book
The best way to judge an installer is to see finished work in person and ask about the film brand and warranty. Any shop can show photos; fewer can hand you a warranty document and a vehicle you can inspect.
Use this checklist before you commit:
- Ask which vinyl film brands they stock
- Request two or three local references you can contact, not just online reviews
- Visit the shop and look at the bay where wraps are applied
- Confirm they handle installation themselves rather than subcontracting
- Ask what happens if an edge lifts within the first year
- Get the warranty terms in writing before you pay a deposit
- Ask what surfaces they cover
A clean, climate-controlled bay matters more than a slick website. Dust and temperature swings cause defects, and you can see both conditions in person.
Vehicle Wrap Cost: What Drives Your Quote
Vehicle wrap cost depends on four things: vehicle size, how much you cover, the film you choose, and the condition of the paint underneath. Pricing varies by shop, region, and material, so get a written quote rather than working from a national average. Here is how each factor moves the number.
| Cost Factor | What It Changes | How It Moves the Quote |
|---|---|---|
| Vehicle size | Film quantity and labor hours | A compact car and a full-size van can differ by several rolls of film and a full day of labor |
| Full vs. partial wrap | Total surface covered | A partial wrap typically covers roughly half the body, so material and labor drop accordingly |
| Film type and finish | Material price per roll | Cast vinyl for wraps costs more than calendared signage film; specialty finishes cost more than gloss or matte |
| Paint condition | Prep time before installation | Dents, rust, and peeling clear coat add bodywork hours before any film is applied |
| Design complexity | Print and layout time | A solid color-change wrap needs no design work; a printed fleet layout needs proofing and color matching |
| Removal of old wrap | Strip and clean time | Old film must be heated, peeled, and the adhesive residue cleaned before new film goes on |
Why Two Quotes for the Same Truck Can Differ
Film is not a commodity. Cast vinyl designed for vehicle wraps behaves differently from calendared film built for flat signage, and the price gap reflects that. Two shops quoting the same truck may be quoting different materials and warranty terms.
Labor is the other variable. A shop that skips paint correction and installs in a dusty bay can quote lower and still profit; the difference shows up eighteen months later when edges lift. Ask what each quote includes: Is the vehicle washed and solvent-wiped? Are door jambs wrapped? Is there a post-cure visit? Are old graphics removed?
How to Read a Written Estimate
A written estimate should separate materials from labor, name the film, state the coverage level, and list what is excluded. Watch for these patterns:
- A single lump-sum number with no film name, you can't tell what you're buying
- No mention of prep or paint correction, those hours are either skipped or will appear as a surprise add-on
- No warranty terms in the estimate, ask for them before you pay a deposit
- A price far below the others, usually thinner film, skipped prep, or a subcontracted installer
Fleet Vehicle Wraps for Business: Coverage, Graphics, and Fleet Branding
Fleet vehicle wraps turn every truck in your lineup into a moving billboard, and consistency across vehicles matters more than any single design.
The practical decisions come down to a few choices:
- Coverage level: full wrap, partial wrap, or spot graphics on doors and tailgates
- Design system: one layout that scales across van, pickup, and box truck
- Color consistency: matching film lots so vehicles ordered months apart still match
- Readability at speed: large type, high contrast, and a phone number or short URL people can actually read in motion
Readability is where a lot of fleet branding fails. You have a few seconds of a driver's attention, so the design has to work at a glance. We build fleet layouts with that constraint first, then layer in the details.
A truck wrap also protects resale value. When the wrap comes off, the paint underneath has been shielded from sun and road debris, which helps at trade-in.
Vehicle Wrap Maintenance and Aftercare
Vehicle wrap maintenance is simple but not optional: hand wash with mild soap, skip the automatic brush wash, and park in shade when you can. Those three habits cover most of what keeps a wrap looking new.
Hand washing with a soft mitt and pH-neutral soap protects the film's top layer. Brush car washes grind grit into the vinyl and dull the finish; if you must use an automated wash, choose a touchless one.
Other habits that extend wrap life:
- Remove bird droppings and bug splatter promptly, since they are acidic
- Avoid pressure washing close to edges and seams
- Skip wax designed for paint; use products made for vinyl film
- Park indoors or under cover when possible to slow UV fading
Expect a quality wrap to last several years with normal care. Fading and edge lifting are the most common aging signs.
DIY vs Professional Installation: What You Risk
DIY vinyl wrap kits look affordable until you price the redo.
Professional installation exists because the hard parts are invisible.
There is a middle path worth knowing. Some business owners supply their own printed graphics, then hire a local installer to apply them, useful when you already have a designer and just need skilled hands.
Wrapping a vehicle is a decision about how your business looks on the road for the next several years, and a bad install undoes a good design.
Frequently Asked Questions
How do I choose a professional vehicle wrap installer?
Look for a shop that handles the work in-house, shows a project gallery of real vehicles, and explains how it prepares surfaces before applying vinyl. Ask whether the installer uses name-brand vinyl film, what warranty covers lifting or peeling, and whether the quote includes removal of old graphics. A local installer who can show completed work on similar vehicles (trucks, vans, or storefront graphics) gives you a clearer picture of installation quality than a low price alone.
How much does it cost to wrap a commercial vehicle?
Vehicle wrap cost depends on vehicle size, coverage (full wrap vs partial wrap), vinyl film choice, and design complexity. A full wrap on a cargo van uses more material and labor than a partial wrap with door logos. Pricing also changes with custom graphics, chrome delete, and whether old vinyl needs removal. Because every quote is built around your specific vehicle and coverage, request a quote with your vehicle details rather than relying on a single national average.
How long does professional vehicle wrap installation take?
Most passenger vehicles and small commercial vans take one to three days in the shop. Larger fleet vehicle wraps or full color-change wraps can take longer. Surface preparation, curing time, and the number of vehicles in the queue all affect the schedule. Ask your installer for a written timeline before dropping off the vehicle, and avoid washing it for the first week after installation.
How long does a commercial vehicle wrap last?
A quality vinyl wrap on a well-prepared surface typically lasts several years, but lifespan depends on sun exposure, wash habits, and installation quality. Parking outside in direct sun shortens the life of any vinyl film. Hand washing with mild soap and avoiding abrasive brushes helps the finish last longer. If you notice edges lifting or fading, contact your installer early; small fixes are cheaper than a full rewrap.